Wednesday 29 July 2015

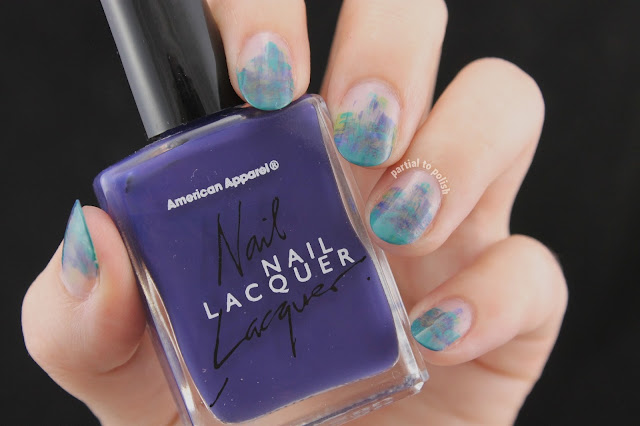
Blue & Green Negative Space Dry Brush Gradient Featuring Girly Bits I've Got High Hoops!

Hi everyone! Today I have my second dry brush look I've ever done to share (first one here)!

Thank you guys so much for the lovely comments on my last post, they really mean a lot. I'm so behind in posting on social media and responding to comments but I will really try to get caught up soon!

In case you were wondering, the big change I was talking about was that my boyfriend and I broke up. We dated for almost three and a half years, all through my college and university life (so far) and starting near the end of grade twelve. I know it was for the best, however, so I know I'll be okay.

Serious stuff aside, onto the nails!

Blue & Green Negative Space Dry Brush Gradient Featuring Girly Bits I've Got High Hoops

I never write about the fact that I always start with a coat of base coat (Orly Bonder) but I do! I always mention the top coat I use (Essie Good To Go) so it's only fair to start talking about my favourite base coat!

Blue & Green Negative Space Dry Brush Gradient Featuring Girly Bits I've Got High Hoops

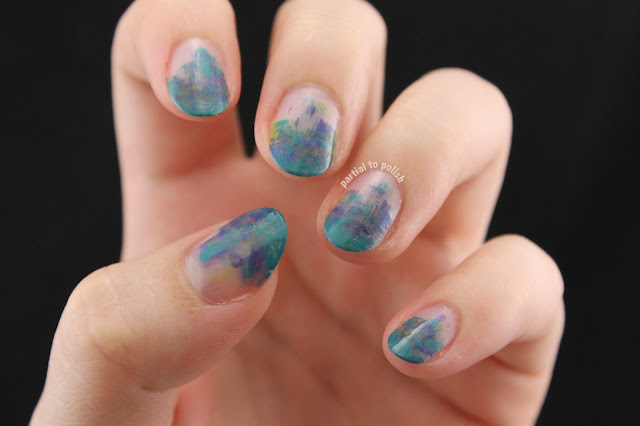
Next, I went in with American Apparel Mount Royal (dark blue seen in the bottle shot below), OPI Green-wich Village (sheer green), Girly Bits I've Got High Hoops (medium brighter blue) and American Apparel Malibu Green (teal) in that order. I wiped most of the polish off of the brush before swiping horizontally and vertically across my nail with each colour.

Blue & Green Negative Space Dry Brush Gradient Featuring Girly Bits I've Got High Hoops

After a bit of dry time I added a coat of my trusty Essie Good To Go and I was finished!

Blue & Green Negative Space Dry Brush Gradient Featuring Girly Bits I've Got High Hoops

These also felt quite salon-y to me as well as very beach/ocean inspired! I liked wearing these quite a lot, though they did chip quite fast. I think that happens more easily when the layer of polish is thinner so I wasn't too surprised. I was also happy to create a dry brush look that I liked because I'm generally not a fan of the way this technique looks.

Blue & Green Negative Space Dry Brush Gradient Featuring Girly Bits I've Got High Hoops

What do you guys think of this look or the dry brush technique in general? I'd love to know!

Blue & Green Negative Space Dry Brush Gradient Featuring Girly Bits I've Got High Hoops

Thanks for having a look guys! I'll be back with a water marble look followed by some raspberry nail art! Happy Wednesday! :)
Saturday 25 July 2015

Negative Space (Naked) Holographic Diamond Glitter Nails!

Hey everyone, today I have some negative space glitter nails to share!

A big change in my life happened recently so the motivation to blog was definitely not there. I want it to come back and I've really missed posting on here, so I'm going to try and get back to posting! Blogging and nails are a huge part of my life and I definitely don't want that to change!

Negative Space (Naked) Holographic Diamond Glitter Nails

To start, I did something I always do but don't usually mention on here; applied a coat of base coat (Orly Bonder). 

Negative Space (Naked) Holographic Diamond Glitter Nails

Next, I went in with Wet N Wild Wild Shine Clear Nail Protector (as a slower-drying option to my normal top coat), a brush dipped in it and the holographic diamond glitters (from eBay, see another post featuring them here). I painted a stripe or a blob depending on the nail, and then picked up and placed the glitters one by one. I think this clear polish still dries pretty fast so I wouldn't actually recommend it for something like this.

Negative Space (Naked) Holographic Diamond Glitter Nails

After a bit of dry time, I applied a coat of top coat (Essie Good To Go) and I was done!

Negative Space (Naked) Holographic Diamond Glitter Nails

What do you guys think of these nails? They felt quite salon-y to me and I really like them!

Negative Space (Naked) Holographic Diamond Glitter Nails

Thanks so much for having a look everyone! I'll be back with some negative space dry brush nails as well as a pastel water marble! Happy Saturday guys! =)

Thursday 9 July 2015

Doctor Lacquer Testosterone Swatch & Review!

Hello everyone! Today I have an adorable thermal polish from Doctor Lacquer to share!

Today I have a quick post with lots of pictures for you guys! I'm still not caught up on here and I'm really not caught up on most of my other social media accounts so hopefully I can finally get caught up soon.

Anyways, onto the nails!

Doctor Lacquer Testosterone Swatch & Review

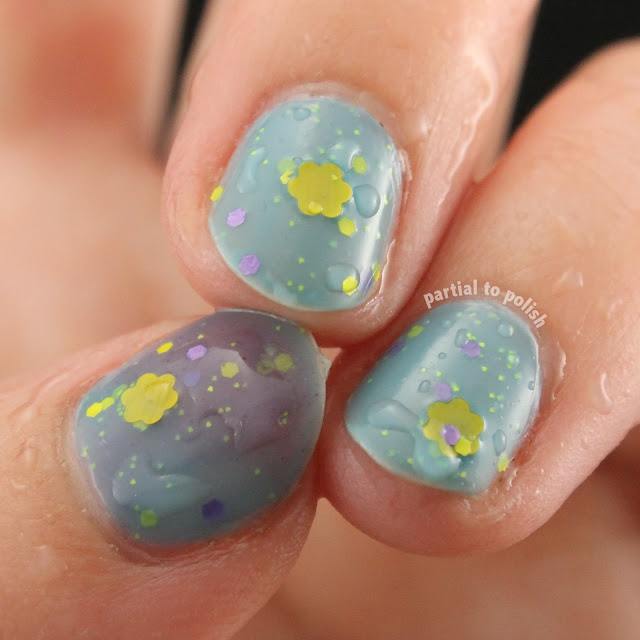
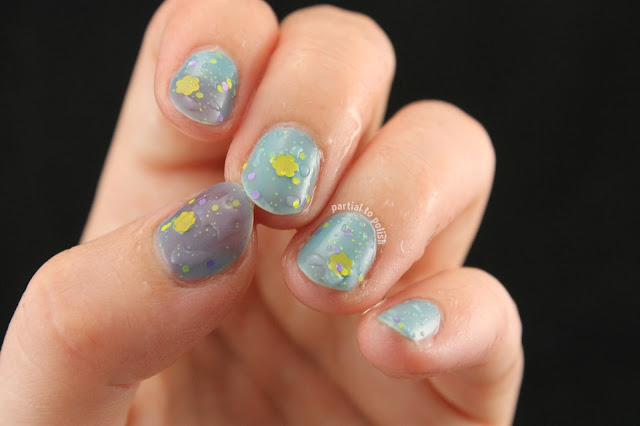
What you see here is three easy coats of Testosterone. It dried matte/satin and so freaking fast which was awesome! By the time I finished a coat on one hand the other hand was completely dry which was crazy to me! It had a great formula and was so easy to work with.

Doctor Lacquer Testosterone Swatch & Review

This polish is a cold-sensitive thermal, meaning it will only change colour if it gets colder than room temperature (hence why my nails and the bottle are blue). Because of this, I didn't see it turn purple unless I held my nails in ice water for about thirty seconds.

Doctor Lacquer Testosterone Swatch & Review

Here it is transitioning from cold (purple) back to warm (blue). Look at those adorable glitters! It's really cool that the purple glitters almost blend in to the polish when it's cold, it gives the polish a totally different look!

Doctor Lacquer Testosterone Swatch & Review

I absolutely loved wearing this polish. I've been pining for these polishes since they came out so I'm so happy to own the whole Hormonal Efficiency collection now!

Doctor Lacquer Testosterone Swatch & Review

Doctor Lacquer Testosterone Swatch & Review

What do you guys think of this polish or Doctor Lacquer in general? I'm madly in love with both already!

Doctor Lacquer Testosterone Swatch & Review

Thanks so much for taking a look everyone! I'll be back with some negative space glitter nails and some negative space dry brush nails! Happy Thursday guys! :)

Saturday 4 July 2015

Born Pretty Store Nail Polish Remover Dish Review!

Hello everyone! Today I have a review of a super cute little dish from Born Pretty Store to share!

Today is my boyfriend's birthday and we've had a relaxing day of board game playing and sitting outside in the Sun. We are going to my favourite restaurant tonight for dinner which is also super awesome! It's a Japanese place if you're wondering. The plan for after dinner is to play more board games and watch more Avatar so it seems like today will continue to be lovely!

Onto the review!

Born Pretty Store Nail Polish Remover Dish Review

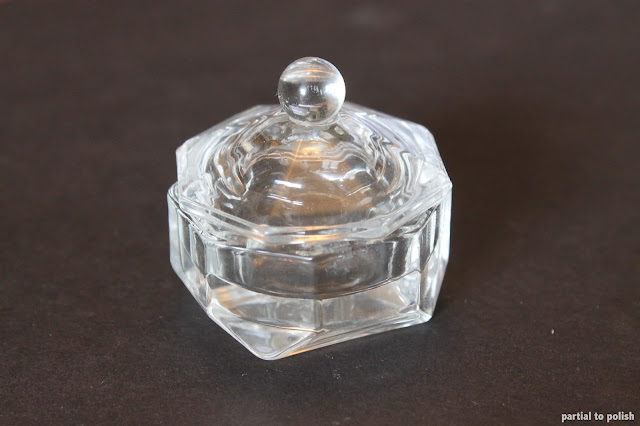
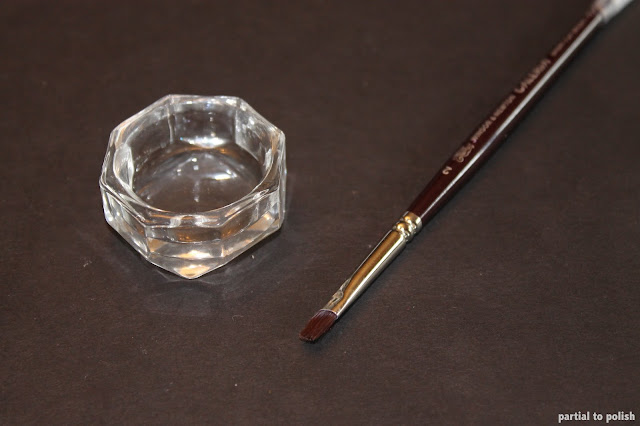
I love this thing (link) because I used to use the lid of my acetone bottle, and this way I can close my acetone (after pouring some in here) which is a lot safer! It is easy to clean and with the lid on it seems to keep the acetone from evaporating away as quickly. The lid doesn't seal the container and it actually can spin around and sit in any orientation relative to the bottom (see above picture where it doesn't appear to be on correctly). I received this container a few months ago and there hasn't been a time that I haven't used it since!

Born Pretty Store Nail Polish Remover Dish Review

Do you guys use any little containers like this while you're cleaning up? I am so glad I picked it out to review because I know I'll get a ton of use out of it! Also, it's on sale right now for $4.24 USD which is pretty cool!

Born Pretty Store Nail Polish Remover Dish Review

Thanks so much for having a look everyone! If you'd like to pick this or any nail art stuff up be sure to use my code for 10% off; SKBQ10!


Happy Saturday guys! :)

This product was provided in exchange for an honest review.

Thursday 2 July 2015

Tooth Nail Art Featuring KBShimmer Laugh Myself Lily & piCture pOlish LakoDom!

Hello everybody! Today I have some teeth nail art to share!

I think I'll stick a little wisdom tooth removal update here seeing as these are the nails I did for the day of my surgery (and wore for several more days)! It will be two weeks since my surgery tomorrow and by now I can eat basically anything again (I am avoiding seeds and tiny things like that that could become lodged in my healing gums). For several days I was doing jaw stretching exercises and now I can open my mouth as wide as I could before. Except for sore teeth and jaw muscles occasionally (from getting used to eating hard foods again) I'm feeling back to normal!

Anyways, onto the nails!

Tooth Nail Art Featuring KBShimmer Laugh Myself Lily & piCture pOlish LakoDom

For the turquoise nails, I applied three easy coats of KBShimmer Laugh Myself Lily. It was a breeze to work with and it is so freaking pretty!

Tooth Nail Art Featuring KBShimmer Laugh Myself Lily & piCture pOlish LakoDom

For the teeth nails, I started off with a base of two coats of piCture pOlish LakoDom. By now I've learned that every piCture pOlish has a perfect formula and their brushes are so lovely too!

Tooth Nail Art Featuring KBShimmer Laugh Myself Lily & piCture pOlish LakoDom

Next, I went in with some cremes that matched some of the glitters in Laugh Myself Lily; American Apparel Rose Bowl (to me, this is a pink but to others I think it leans more orange and looks coraly), Essie Play Date (purple) and Revlon Dreamer (blue). I never did get a picture, but on my other hand I painted a huge purple tooth on one of the accent (white) nails rather than a bunch of tiny ones.

Tooth Nail Art Featuring KBShimmer Laugh Myself Lily & piCture pOlish LakoDom

What do you lovely people think of this look? Lately I've been feeling really proud of myself because I've been incorporating lots of indie polishes into my nail art. Sometimes I start to worry that I'll never be able to use them all, but I'm sure I can if I continue to shy away from the mainstream brands and towards indie brands in my nail art!

Tooth Nail Art Featuring KBShimmer Laugh Myself Lily & piCture pOlish LakoDom

Thanks so much for taking a look guys! I'll be back with a gorgeous thermal by Doctor Lacquer as I mentioned a few posts ago! Happy Thursday! =)

Wednesday 1 July 2015

Canadian Flags for Canada Day Featuring piCture pOlish, Cirque Colors and Black Sheep Lacquer!

Hello everyone! Today I have some Canada Day nails to share!

We are running out the door to join in on the Canada Day festivities, so this post will be a quick one word-wise! Happy Canada Day everyone!

Canadian Flags for Canada Day Featuring piCture pOlish, Cirque Colors and Black Sheep Lacquer

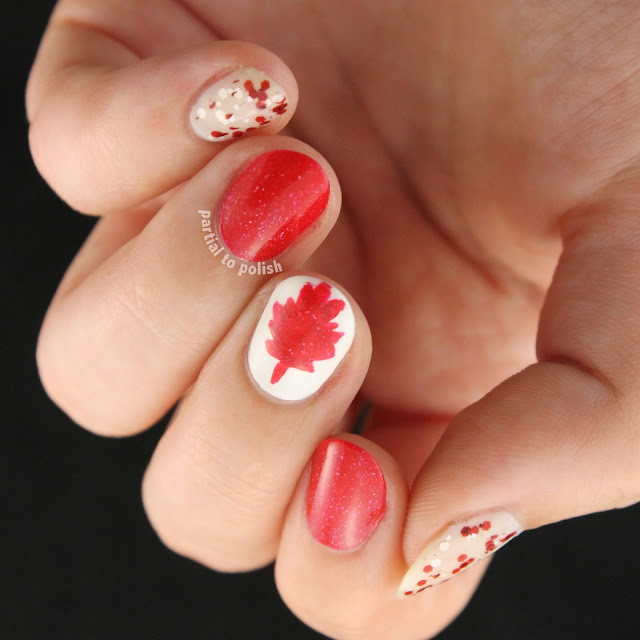
For the middle finger nails, I started off with two easy coats of the best white I've ever used; Cirque Colors Carpe Diem. Next, I went in with piCture pOlish O'Hara on a small detail brush for the maple leaf.

Canadian Flags for Canada Day Featuring piCture pOlish, Cirque Colors and Black Sheep Lacquer

On my index and ring finger nails, I applied two coats of O'Hara. The formula, brush and everything else about this polish was perfect!

Canadian Flags for Canada Day Featuring piCture pOlish, Cirque Colors and Black Sheep Lacquer

Finally, for the pinkies and thumbs I applied three coats of Essie Waltz followed by a coat of Black Sheep Lacquer Grab Your Toque!

Canadian Flags for Canada Day Featuring piCture pOlish, Cirque Colors and Black Sheep Lacquer

A bit of dry time and a coat of Essie Good To Go top coat and I was done!

Canadian Flags for Canada Day Featuring piCture pOlish, Cirque Colors and Black Sheep Lacquer

Canadian Flags for Canada Day Featuring piCture pOlish, Cirque Colors and Black Sheep Lacquer

Canadian Flags for Canada Day Featuring piCture pOlish, Cirque Colors and Black Sheep Lacquer

What do you guys think of this look? Are those of you that are Canadians wearing some festive nails today? I'd love to know!

Canadian Flags for Canada Day Featuring piCture pOlish, Cirque Colors and Black Sheep Lacquer

Thanks so much for reading everyone! I'll be back with some swatches and some nail art very soon! Happy Wednesday! :)